The Benefits of Mastering the Reverse Plank
The reverse plank is a slightly unorthodox exercise, and not many people take advantage of it today. But despite the weird exterior, reverse planking is an excellent way to strengthen your entire body, improve your stability, and reduce your risk of injuries. As its name suggests, the idea behind a reverse plank is to extend your body into an isometric position. But, instead of facing the floor, you extend your arms back and face the ceiling.
The reverse position is beneficial for two reasons. First, you develop your midsection musculature. Second, the movement strengthens the often-ignored posterior: hamstrings, glutes, and lower back (1). As a result, you improve your balance, become more stable, and reduce your risks of injuries during sports or everyday tasks.
Similar to the regular plank, the reverse version is an accessory movement. Meaning, you can include it at different points of your workout. For example, if you do five exercises per workout, you can include the reverse plank somewhere in the middle.
How to do a Reverse Plank
- Sit on the floor with your legs straight, positioned forward, and feet together. Your toes should point toward the ceiling.
- Extend your arms to your sides and behind your body. Keep your elbows as straight as possible and place your palms flat on the floor with fingers pointing forward.
- With your hands planted firmly, contract your glutes and extend your hips toward the ceiling as you simultaneously raise your torso.
- Your head, neck, torso, and legs should be in a straight line. Your elbows should be entirely straight, and your gaze should be directed toward the ceiling.
- Keep your glutes and midsection engaged, maintain a steady breath, and hold the plank position for up to one minute.
- Once you’re done, drop your buttocks to the floor and take a break.
What muscles does the reverse plank activate?
The primary muscles involved in the reverse plank are those in the midsection: abs, obliques, and transverse abdominis (1). These muscles flex isometrically to keep us in the reverse plank position. Our posterior muscles (glutes, hamstrings, and entire back) work simultaneously. The glutes and hamstrings produce hip extension, allowing us to keep our pelvis aligned with our shoulders (2, 3).
Our arms and shoulders also work to provide support for the upper body. Specifically, the triceps keep our elbows straight, and our deltoids offer stability at the shoulder joint.
Aside from that, we can expect some quadricep engagement. The quadriceps cover the front part of our thighs and produce knee extension (4). Meaning, the muscle group activates to keep our legs straight during the reverse plank. One of the quadricep heads, the rectus femoris, also crosses the hip joint, providing some hip stability (5).
Proper Form when Performing a Reverse Plank
Despite being a bodyweight movement, the reverse plank is far from an easy exercise. Doing the reverse plank requires adequate strength in the midsection, posterior chain, and arms. So, developing the three areas is a great start. Movements like the deadlift, overhead press, pulldown, barbell row, bench press, and tricep extension strengthen the shoulders, triceps, and chest. You can also include regular planks to promote midsection stability before attempting a reverse plank (6).
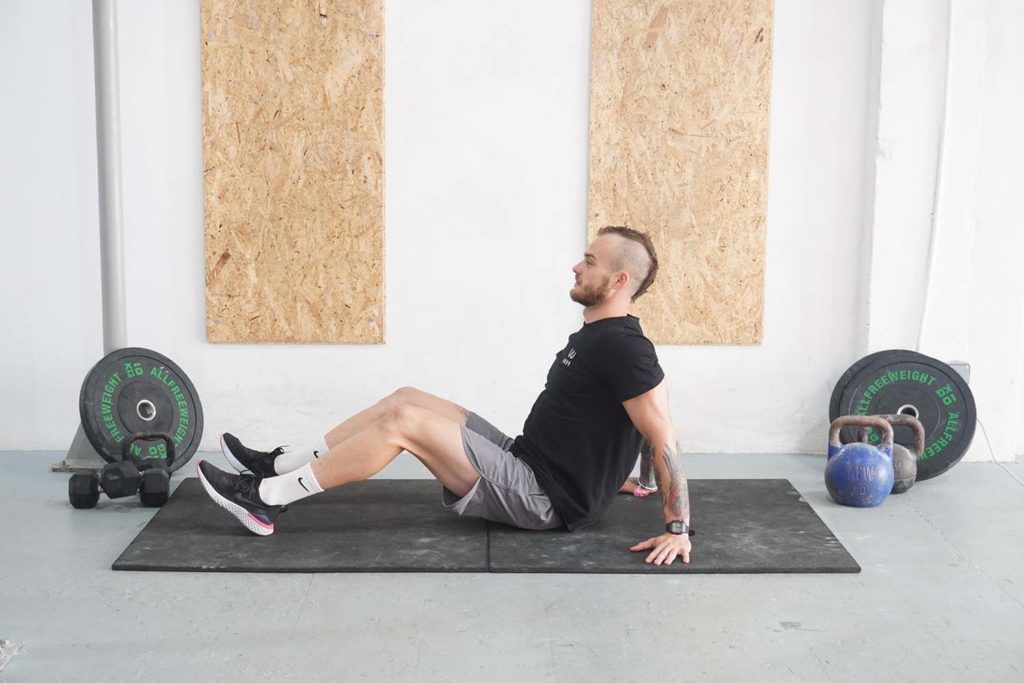
The first and most important tip to remember for reverse planking is to set up effectively. Begin in a seated position with your torso leaning back and hands planted on the floor. Your hands should be slightly behind your hips. Straighten your legs, have your feet a few inches apart, and make sure that your heels are in contact with the floor. Once in position, extend your hips by contracting your glutes.
You can also start with shorter holds to build some strength. For example, you can assume the reverse plank position, hold it for two to four seconds, and lower your buttocks to the floor. Wait half a minute, extend your hips again, and repeat the sequence several more times.
Variations and Modifications of the Reverse Plank
1. Reverse Tabletop Position
The reverse tabletop position is a suitable variation to reverse planking. The primary difference is that your knees are bent, and your feet are planted on the floor. Assuming such a position makes the exercise slightly easier because your legs play a more active role in supporting you.
2. Reverse Elbow Plank
Similar to regular planks, you can make the reverse variation easier by supporting your upper body on your elbows instead of having your arms straight. The variation allows for greater stability because your forearms are on the floor. Plus, you’re not placing any stress on your wrists.
3. Single-Leg Reverse Plank
Unlike the previous version, the single-leg reverse plank is an excellent movement for more advanced folks. The goal is to assume the reverse plank position but lift one foot off the floor. In doing so, you train your rectus abdominis more and introduce greater instability, making the exercise more challenging.
Mistakes to Avoid
A common mistake with reverse planks is hyperextension. In their efforts to do the exercise effectively, many trainees overextend their hips, creating an unnecessary arch in the back. The position isn’t ideal because it prevents the rectus abdominis from contributing as much. Plus, you place more stress on your spine. Instead, you should strive for a neutral spine position, with your knees, hips, and shoulders in a straight line.
Another mistake, which contrasts the first one, is buttock sagging. For example, you assume the reverse plank position and hold it for a few seconds. But, at some point, you notice your buttocks sagging to the floor. The mistake typically results from fatigue. So, you should stop the set if you start losing your position.
The third mistake with reverse planks is bending your elbows. Doing so puts unnecessary tension on your triceps, making the exercise more challenging. Instead, you should lock out your elbows and keep them in that position for the duration of each set. Doing so will keep your triceps in the strongest position, preventing them from being a limiting factor.
Similar Exercises to the Reverse Plank
Hip Thrust
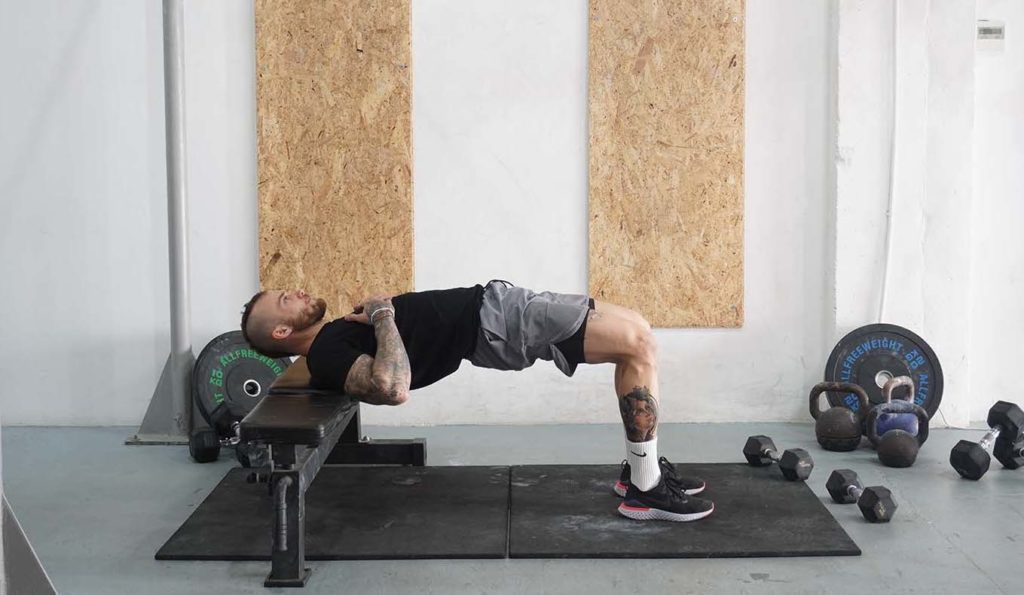
The hip thrust is a simple compound exercise that strengthens your posterior chain and works similarly to a reverse plank (7). You have to support your upper back on a gym bench, bend your knees, and plant your feet on the floor. Once in position, extend your hips to the ceiling by engaging your glutes. Hold the top position for a moment and lower your buttocks to the floor.
Glute Ham Raise
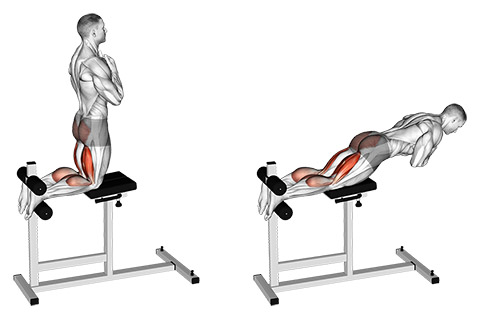
The glute ham raise is an accessory exercise that trains the same muscles as reverse planks: the hamstrings, glutes, and lower back (8). Unlike reverse planks, the glute ham raise is a more dynamic movement. You have to anchor your feet inside a glute ham machine, place your knees on a pad, and use your posterior muscles to lift and lower your torso.